|
User Guide
Version 0.02 Powered by: IT Staff BISE
MARDAN BOARD OF INTERMEDIATE
& SECONDARY EDUCATION MARDAN
ONLINE ENROLMENT SYSTEM INTRODUCTION TO PORTAL: A
portal is a web system that provides the functions and features to
authenticate and identify the users. It provide them with an easy,
personalized and user-customizable web-interface for facilitating access to
information and services that are of primary relevance and interests to the
them. To the organization that sets up the portal, it is a system that
provides versatile functions for the organization to catalogue or organize
collections of different and multiple sources of information and service resources
for dissemination to many users according to their specific privileges, needs
and interest. Hence, the main purpose of setting up a portal is to bring
the vast information and service resources available from many sources to
many users in an effective manner. BISE MARDAN is currently focusing
on extensive use of the web to disseminate information and provide services
to their users, say; their staff members, schools/colleges for Enrollment,
Registration, Affiliation, Renewal, etc. To cope with the various needs of
different users and to gain access to the required information or service
without any difficulty, are numerous types of information and services that
can be available to all kinds of users would be grouped together and
presented on the web according to the nature of the operational
functions. To improve the user-friendliness and
to enable convenient access to different kinds of information and services
mounted on the web by users, it is desirable to set up a portal for
channeling the vast information resource and many services to different users
in an efficient and effective manner so that when a user can be identified by
the portal, personalized information and services which are relevant or of
interests to the user are presented to him according to his profile. BISE MARDAN, following the same
idea, for the first time, has officially launched its web portal http://portal.bisem.com.pk to provide such a platform for all
its stakeholders. How to access? Step 1: Start the browser (figure 1) installed
on your computer, e.g Internet Explorer, Mozila Firefox , Google Chrom etc.
Figure 1 ((Google Chrome Browser) Step 2: Type
in the address bar of the browser, portal.bisem.com.pk (figure 2) and
press <enter> key.
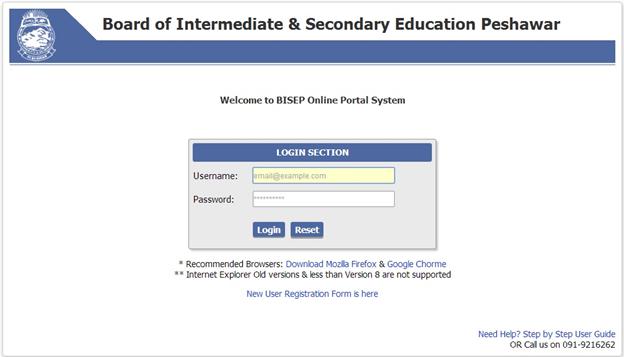
Figure 2 (Address Bar) Step 3: How to login ? With Step 2 the following Login Screen will appeared on your screen (Figure 3)
Figure 3 (Login Screen) i)
Type the username in [Username Box] and password in the [password
box] as per given format in the concerned boxes. ii)
Click the login button to login. a. You can login only if you are a
registered user. b. In case of invalid particulars the
system will not allow you to login. c. Consecutive Five (5) wrong attempts
will lead to lock your account. To unlock your account will be required to
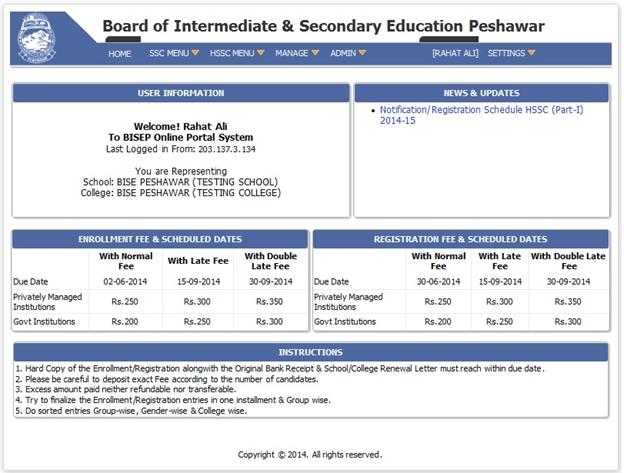
contact with the BISE Webmaster. DASHBOARD / WELCOME SCREEN: After successful login the
dashboard/welcome screen will appeared on your screen (Figure 4). It consists
of welcome message to the user, Institution Name and other useful information.
Figure 4 (Dashboard / Welcome Screen) Online Student Enrollment– The First Milestone of
BISEM Portal: Online
Enrollment System is a web based application, which enables the schools to
enroll their students from their own campuses. It is very less time consuming and instant
report generating system. Institutions are fully capable to insert, edit
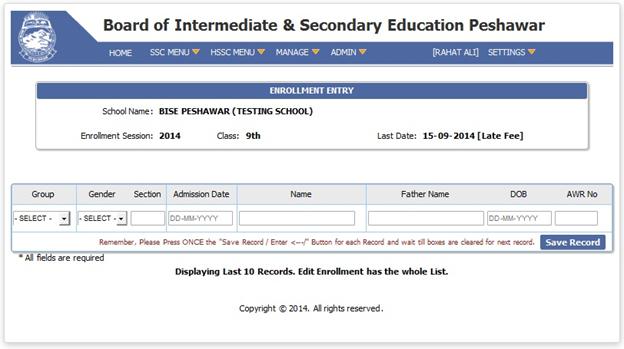
records of students as per the schedule given by BISE MARDAN. How to enroll a new student?
The lower part consists
of Group, Gender, Section, Admission Date, Name, Father’s Name, Date of Birth
and Admission Withdrawal Number. And in the end click “Save Record”
button to save the newly entered record and display it (figure 6).
Figure 6 (Enrollment Entry) The first four fields i.e
Group, Gender, Section , Admission Date once entered
will be automatically repeated with the next record unless otherwise changed.
The last four fields i.e. Name, Father’s Name , DOB
and AWR No will be typed for every new record according to the format where
specified.
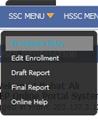
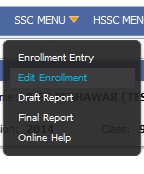
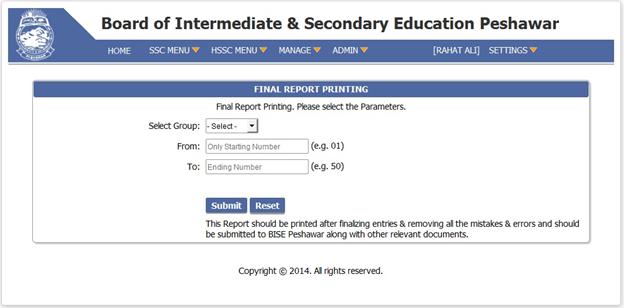
On the dashboard/Welcome Screen click the “SSC
Menu” tab followed by clicking “Edit Enrollment” as shown in (Figure 7). The following form will appear showing all the
existing data (Figure 8).
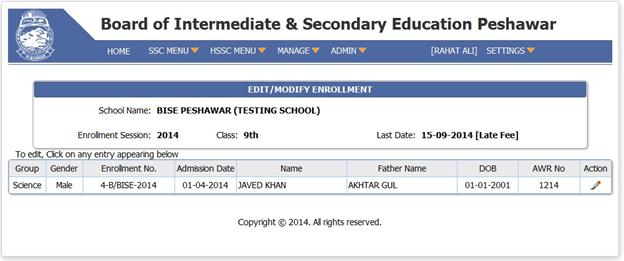
Figure 8 (Existing Data) Now click the desired field of a specific
record that you want to edit, by doing so the following form will appear as
shown in (Figure 9).
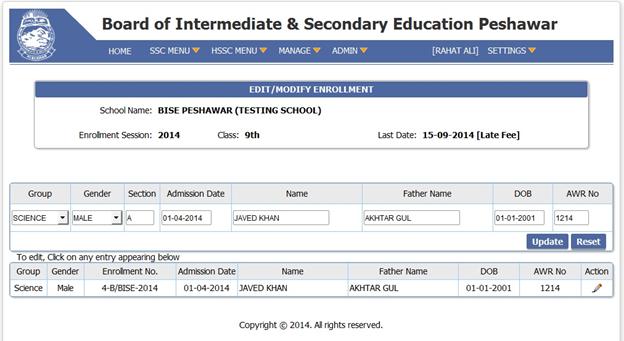
Figure 9 (Edit / Modify Enrollment) Click / Select the
desire field and make changes in the particular followed by click the update
button. The changes will reflect in the enrolment entry and will be displayed
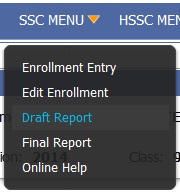
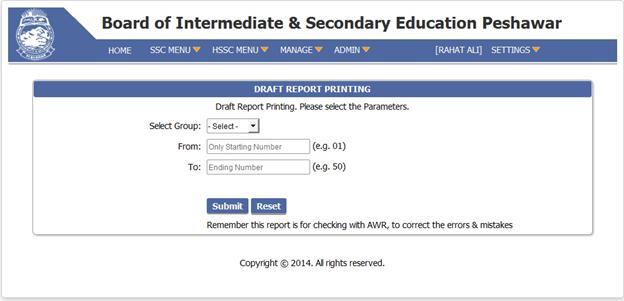
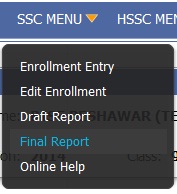
below in grid. How to print the report? There are two types of
reports (1). Draft Report
(2). Final Report. Draft Report: On the dashboard/Welcome Screen you
click on “SSC Menu” and then click on “Draft Report”. (Figure 10)
Figure 10 This report is for
school use in order to check their data with school record, if any mistake/error
found, it may be corrected through edit process as explained earlier.
Figure 11 (Draft Report Printing) By providing the above
parameters (Figure 11) and clicking on submit, generate the draft report as
per BISE format of enrollment proforma.
After clicking the “Final
Report”as
displayed (Figure 13), provide the required parameter i.e. Group , Starting ,
Ending enrollment number and click on submit. It is important to note that when you provide the required
parameter and click on the “Submit Button” , enrollment report will be
generated and the data will be locked , and you will not be able after this
process to make any changes to the records.
Figure 13 The “Final Report” must
be submitted within due dates as mentioned in notification of the BISE
Registration Section. Documents to be attached with the
final report: 1. Covering Letter. 2. Original Bank Receipt (Deposit
Enrollment Fee on Single Receipt) 3. School renewal letter copy. Online Registration– Second Milestone of BISEM
Portal: Online
Registration System is a web based application, which enables the Higher
Secondary Level Schools / Colleges to register their students from their own
campuses. It gives the facility to
retrieve the required data on SSC reference, and maintain the consistency. It
is also very less time consuming and instant report generating system. Institutions
are fully capable to add, edit records of students as per BISE given
schedule.
On dashboard/Welcome
Screen click on “HSSC Menu” tab, you will find a sub menu with many
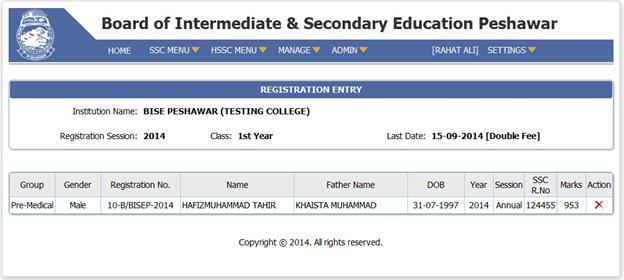
items, click on “Registration Entry” (Figure 14). A form (Figure 15) will appear, in
which the upper portion display the Institution name, class and last date with
normal fee, late or double late fee status. The second portion
consists of two blocks, in the left block user will provide the SSC reference
of the student that is going to be registered. For example, 1. Select Board name from the first
box (student who passed SSC from that Board). 2. Select Group i.e. Pre-Medical ,
Pre-Engineering etc 3. SSC Passing Year (student passed
SSC in which year) 4. Session (Annual or Supply) 5. SSC Roll No. After providing the
above information the right side block will ensure you about the eligibility
of the students for registration. If the student is eligible the system will
give you the message that all particulars are ok, please registered the student.
User will then click on button “Register this Student”. If the student is not
eligible, then the system will give you concerned message and the student will
not be registered. For eligibility of the regular student registration please
keep in mind the following simple rules. 1. SSC Failed Student cannot be
registered. 2. SSC Passed in “E Grade” third division
cannot be registered. 3. A student cannot be registered in an
invalid group i.e. a student passed SSC in Arts Group, cannot be registered
in Pre-Medical or Pre-Engineering or Medical Sciences Group. 4. Once registered student cannot be
registered again. 5. A student appeared privately in
HSSC Exam cannot be registered. 6. Overage student cannot be
registered. All the Khyber
Pakhtunkhwa Boards data is available on this system, if a student belongs to an board other than BISE’s than Khyber Pakhtunkhwa such
case will be sent for Registration as per previous practice.
Figure 15 (Registration Entry)
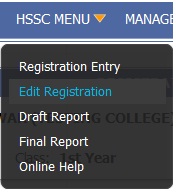
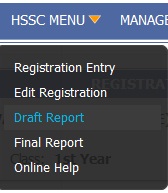
On the dashboard/welcome screen click on “HSSC
Menu” tab click “Edit Registration” (Figure 16). A form will appear on the screen consists
of all the existing data in the grid. (Figure 17)
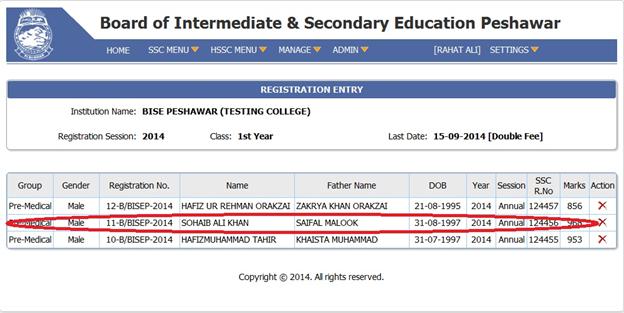
Figure 17 It
is impossible to have mistake in existing record. However, in case of wrong
SSC Reference, user can update/modify the existing record by clicking under
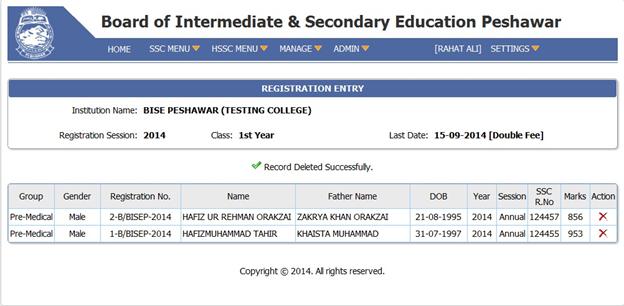
the ACTION column. As a result the specific record will be deleted and the
rest of the records will be rearranged automatically. Finally, the user will
type the intended record with correct SSC reference (see figure 15).
Figure 18
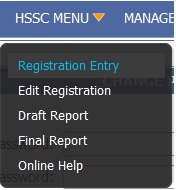
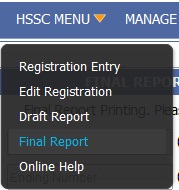
Figure 19 How to print the report? There are two types of
reports (1). Draft Report (2). Final Report. Draft Report: On the dashboard/welcome screen you
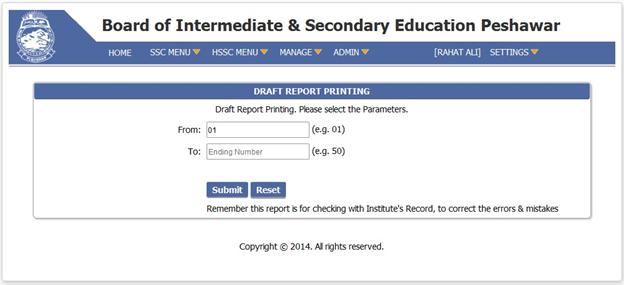
click on “SSC Menu” and then on “Draft Report”. (Figure 20)
Figure 20 This report is for the Institution
use in order to check the date with institution record. If any mistake/error found,
it may be corrected through edit process as explained earlier.
Figure 21 (Draft Report Printing) By providing the above
parameters (Figure 21) and clicking on submit, generate the draft report as
per BISE format of Registration proforma.
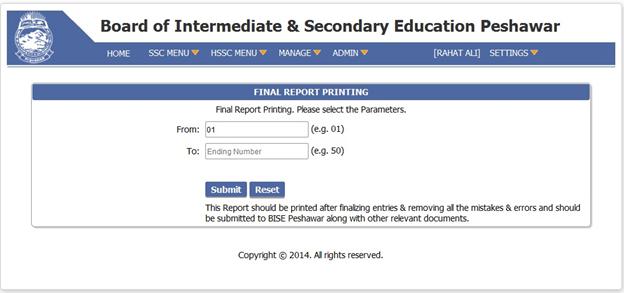
It is important to note that when you provide the required
parameter and click on the “Submit button”, Registration report will
be generated and the data will be locked, you will not be able after this
process to make any changes to the records.
Figure 23 The “Final Report” must be submitted
within due dates as mentioned in notification of the BISE Registration Section. Documents to be attached with the
final report: 1.
Covering
Letter. 2.
Original
Bank Receipt (Deposit Registration Fee on Single Receipt) 3.
Institution
renewal letter copy. USER MANAGEMENT:
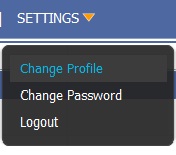
On the dashboard/welcome screen
click “Setting” Menu and click on “Change Profile” (Figure 14). User profile form will be displayed as shown in (Figure 15)
Figure 15 (Change Profile) You can change only your designation and Mobile# , other particulars are unchangeable.
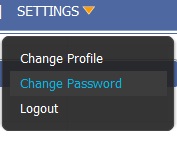
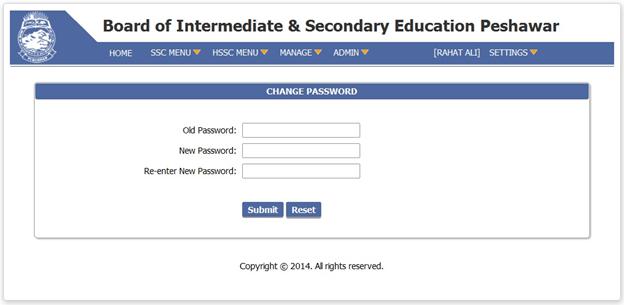
How to change password?
Password must be at least 8
characters long and consist of Upper case, lower case and numbers.
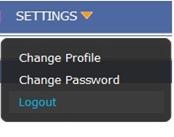
Figure 17 Log Out: When you complete your work and
want to leave the system, so before leaving, you must log out to close your
account. This act will prevent the un-authorized users. Figure18 |